
Now, I have made blueberry pies in the past (Blueberry Crumble Pie), which were delightful, but my hubby is a fan of the lattice top so I think that made this one his favorite. I do have to say that there is something beautiful about enjoying the simplicity of just fruit and pie crust. This pie also uses flour instead of cornstarch, so it's a slightly different outcome of texture and taste.
I made this really easy on myself and used store-bought pie crusts, but by all means, if you have the time and motivation make it from scratch! I like to use Marie Callender's 9 inch pie shells for the bottom and Pillsbury roll out pie dough for the lattice top. It comes out perfect every time without all the work and clean up of making the dough from scratch.
There's not much to this pie. In a bowl, combine the blueberries, lemon juice, vanilla, flour, sugar, cinnamon and salt. Dump the mixture into the frozen (uncooked) bottom pie shell, and dot the top of the berry mixture with 2 Tbsp of butter. (Tip: You can mash half of the berries before mixing if you want the flour/sugar mixture to dissolve quicker into the berries, but it bakes up just fine if you don't do this step. I left all my berries whole.)

Now for the lattice top. Roll out the refrigerated top crust and cut into about 1 inch strips. Lay 4 strips down vertically over the pie and then weave 4 more strips in between, horizontally. Like this: (I give a step by step tutorial in my Peach Pie post.)

The only thing left to do is brush the top with a little egg wash and sprinkle with sugar.

Before I forget: don't neglect the scraps from the top crust! Brush them with egg wash and sprinkle with cinnamon sugar. Bake them along side the pie for just a few minutes (5 or so depending on temperature), just until slightly browned and then take out to cool. They are one of my favorite childhood treats. My dad always called them Lady Fingers, and they are amazingly delicious! (Tip: if you have tiny scraps of dough, press them together and make a larger Lady Finger. Just cut it down to size before baking, so they all bake at the same time. That's what I did with the more round shapes on the bottom right of this pic.)

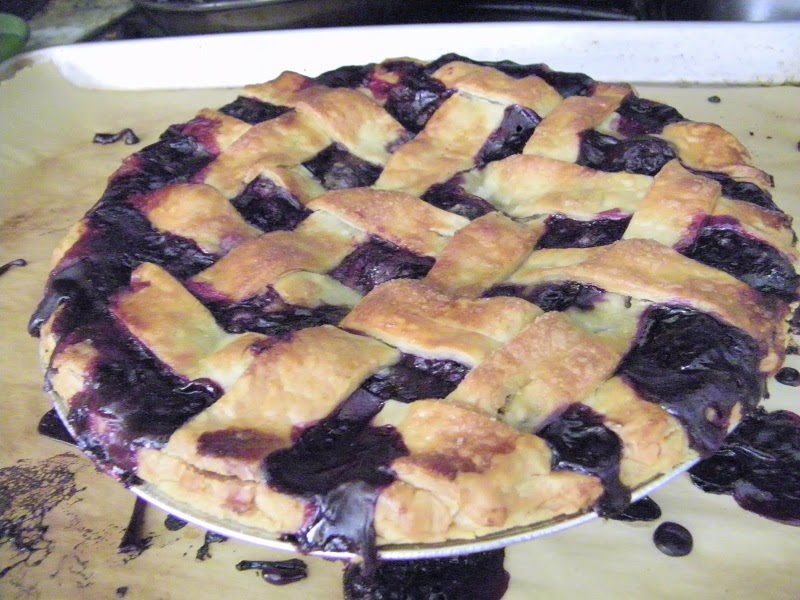
Ok, back to the pie. It get's placed on a parchment lined baking sheet and put into a preheated oven. (Trust me, if you don't use the parchment paper lined baking sheet you are going to be cursing your lovely pie when it bubbles and oozes all over your oven!) I like to bake my pie on the bottom shelf (so the bottom crust stays crunchy and not soggy). I also like to start it off at a higher temperature, to set the bottom crust. So, I typically bake it @ 425F for the first 20 minutes, and then turn the oven down to 400F. I also keep an eye on the pie and cover it with foil when the crust starts to brown, so that it doesn't get too dark.
This pic was taken about 30 minutes into baking. See, it's already starting to bubble and ooze around the edges? But you can see that the berries in the middle still aren't done yet, and the crust is not fully baked. So back in the oven it goes for about another 20 minutes.

When the pie is bubbly all over and all of the crust is brown and crisp (about 50 minutes total baking time), the pie is done. Isn't it beautiful? I like to turn the oven off and open the door. I let the pie cool and set in the oven before taking it out.

When it cools it will deflate some in the center. That's o.k. Now comes the hard part. . . . Are you ready?. . . You have to WAIT! I know. It's torture. You have this amazing pie right in front of you, filling the house with it's intoxicating aroma and it is calling your name. You think it looks set up enough, but it's NOT! Unfortunately, this is the part where you have to muster up all your will power and walk away. Read a book, go to a movie, clean the house. Whatever will help you keep your mind off this mouth watering pie for the next 4 hours at least (It's best if you leave it overnight even.).
Needless to say, 4 hours later, when I could wait no more I cut into my pie. It was well after the kids had gone to bed and I was preparing myself to wait until the morning to have a piece (because pie for breakfast is perfectly acceptable in my book), but then it kept beckoning me to it and I gave in. I mean, I have to make sure it tastes good, right? (I apologize for the odd coloring of the next two pictures. They were alluminated by my overhead stove light. It was late after all.)

It cut really nicely. See, no fruit trying to run out of the crust? I warmed up a piece and topped it with just a little sweetened whipped cream on top. (Yes, even though it's the middle of the night I still took the time to whip up some fresh whipped cream because I'm just that serious about my desserts.) Let me tell you, it passed the taste test!

The next morning, I cut another piece and you can see how beautiful it is. Perfectly set, glistening berries that still retain some of their whole fruit integrity. I could look at this picture all day. (But only because the pie is actually gone now, because I proceeded to enjoy it morning noon and night until it had vanished. Oh, and I shared with the family too.)
You can have it with or without the whipped cream. It tastes heavenly either way.


This piece was warmed in the microwave for about 20 seconds and it still held it's integrity, while eating. No messy pie here. Just pure goodness!

Here's the recipe:
adapeted from Blueberry Pie
Easy Blueberry Pie
5 cups fresh blueberries
1 Tbsp lemon juice
1 tsp pure vanilla extract
2 9 inch pie crusts, unbaked
1 cup sugar (plus more for sprinkling on top)
1/2 cup flour
1/8 tsp salt
1/2 tsp cinnamon
2 Tbsp butter, cut into small pieces
1 large egg, lightly beaten
splash of water (about 1 Tbsp)
Peheat oven to 425F. Combine berries with lemon juice and vanilla. Add the sugar, flour, salt and cinnamon and stir well. Pour mixture into 9 inch pie shell, and dot the top with the butter. Cut the 1 remaining pie crust into about 1 inch strips. Lay 4 strips over the top of the pie, leaving about 1 inch in between each, and then weave 4 more strips in between horizontally. (See Peach Pie tutorial for help). Beat together the egg and water and brush some of the mixture lightly over the top crust of the pie. Sprinkle with some sugar and bake on a parchment lined baking sheet, in the bottom third of the oven @ 425F for 20 minutes. Cover the pie with aluminum foil, and turn down heat to 400F. Continue baking for 20-25 minutes more. Remove foil and finish baking for about 5 minutes, until all the fruit is bubbly and the crust is brown. Turn the oven off and open the door. Let the pie cool to room temperature and then place on the counter to finish setting. Let set for at least 4 hours, preferably over night. Serve plain or warmed with whipped cream or vanilla ice-cream.
**When you put on/take off the foil will depend on your oven and how fast your pie is browning. If it is browning too much before the first 20 minutes is up, then cover it sooner. Keep an eye on your pie.